Step 1: Install Windows Azure Tools via WebPI. This will install any dependencies that are missing. Here is the link
http://www.microsoft.com/web/gallery/install.aspx?appid=WindowsAzureToolsVS2010

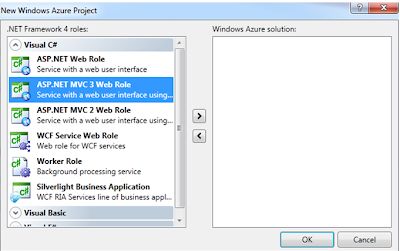
Step 2: Open Visual Studio2010 as an administrator and create an Azure Project.The Azure storage emulator requires administrator privileges.

Step 3: In the next dialog, Add the MVC3 Web Role to the Azure Project.

Step 4: Choose Internet Application Project Template.
Web.Config Configuration for Azure Application - The detault providers (e.g. Membership, Roles, Profile) are configured as universal providers which work with SQL Azure.

Step 5: Create an Azure Hosted Service

In the create Azure Hosted Service, provide following information -

- Choose a subscription : "Selected your already created subscription"
- URL Prefix for your service : "My Service"
- Region : "Choose your region"
- Deployment Options : Do not deploy (at this point of time, our App is not ready for deploy)
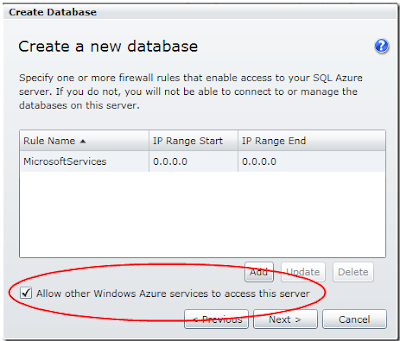
Step 6: Create a SQL Azure Database


View database properties

Step 7: Package the Application for Azure Deployment
- Open the Web.config file and set the connection string appropriately and make two following changes:
- Set the password for the database login which was configured previously.
- Add “MultipleActiveResultSets=True” to the connection string. This setting is required by the Universal Providers used in the MVC 3 application.
- Set the password for the database login which was configured previously.
- Now we’re ready to package our application for Azure deployment.
- The Azure service package and Cloud configuration files will be created and a Windows Explorer window will open up to the folder where the files have been created. Make a note of this directory location. We’ll need it later to find the package to deploy to Azure.
Step 8: Deploy the package on Azure


Happy Programming !


No comments:
Post a Comment